Androidアプリのバージョンアップ対応はたまにしかしないので自分用のメモとして記録しておきます。
Android Studioでapkファイルを作成してGoogle Play Consoleで製品版のリリースを行うところまでの手順です。
手順
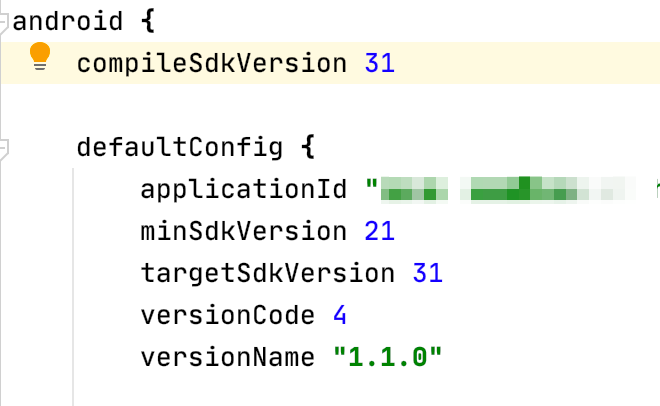
Android Studioのbundle.gradle(Module)を開く

versionCode、versionNameを更新
Sync Nowを実行

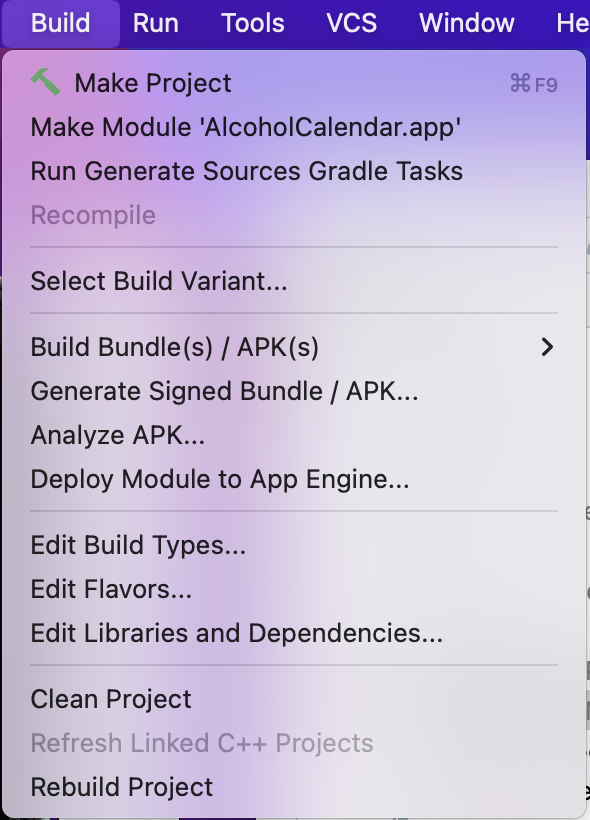
[Build > Generate Signed Bundle / APK...]を選択
APKを選択してNext
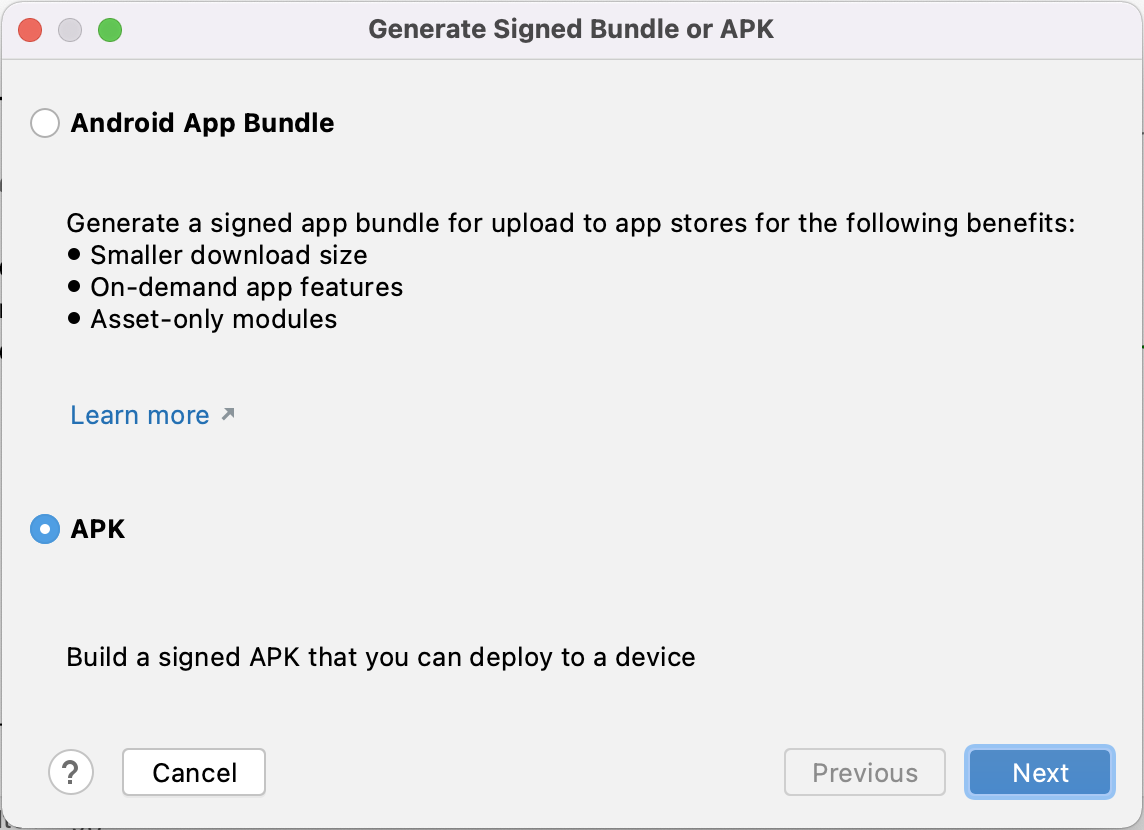
内容は入力済みなのでそのままNext

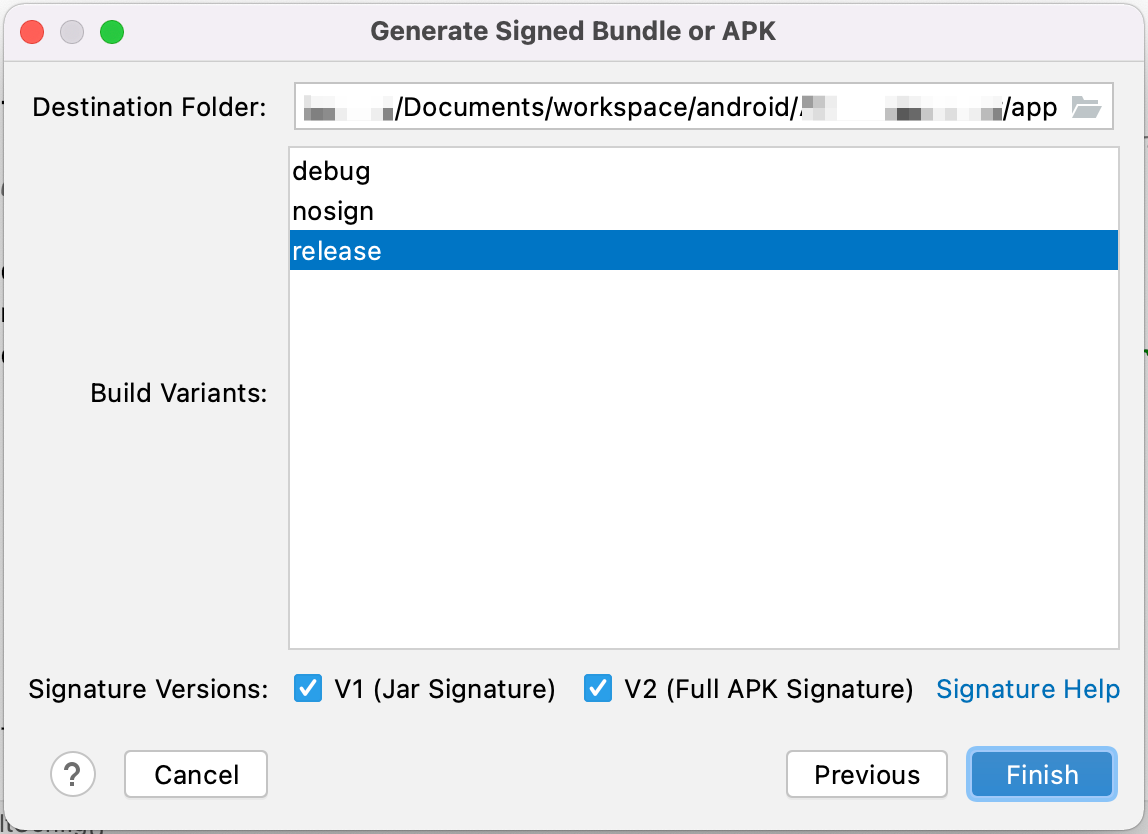
releaseを選択してFinishするとDestination Folderにapkファイルが出力される
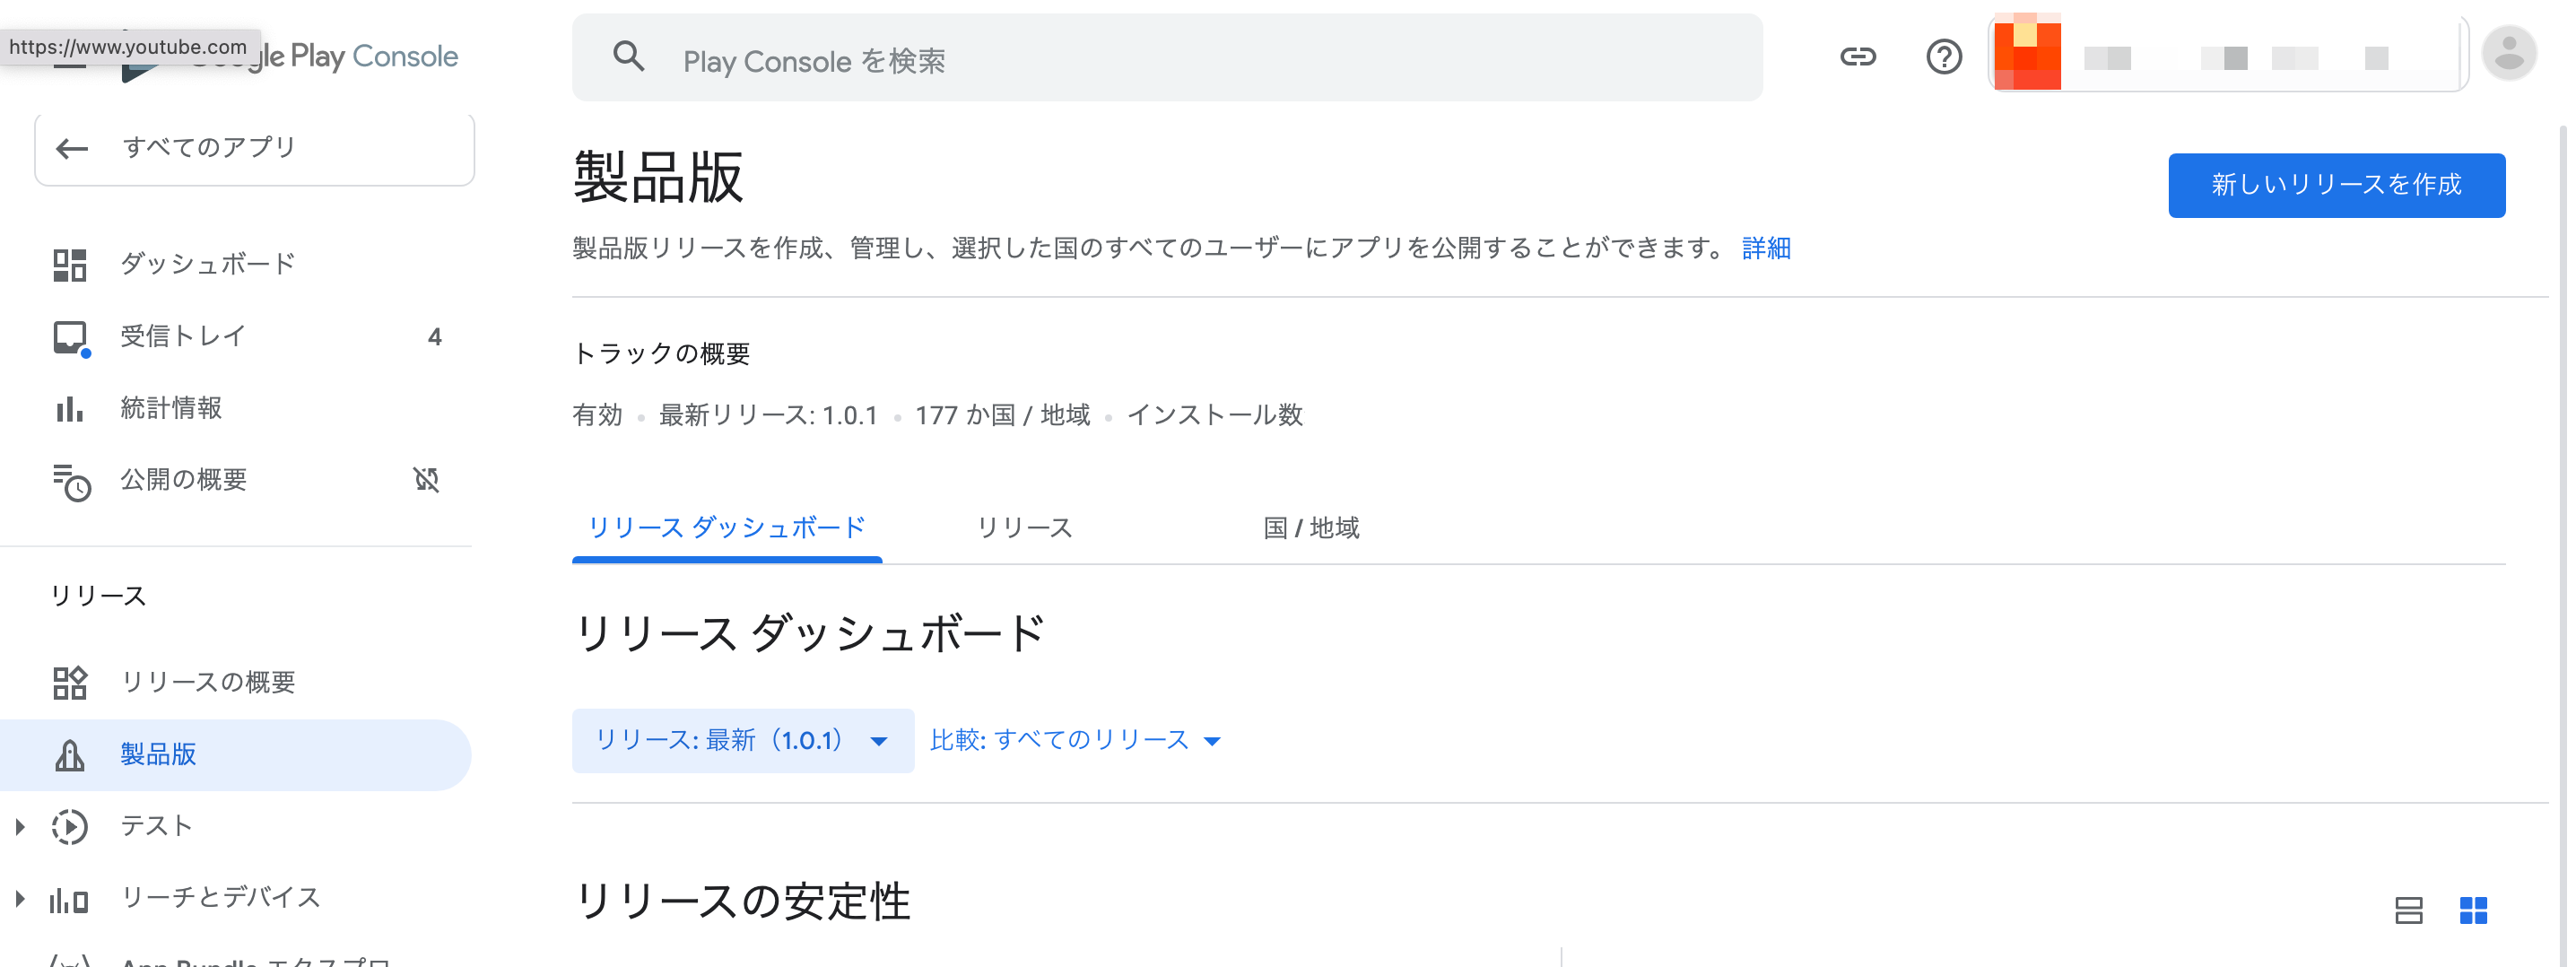
Google Play Consoleの製品版のページを開いて新しいリリースを作成を選択
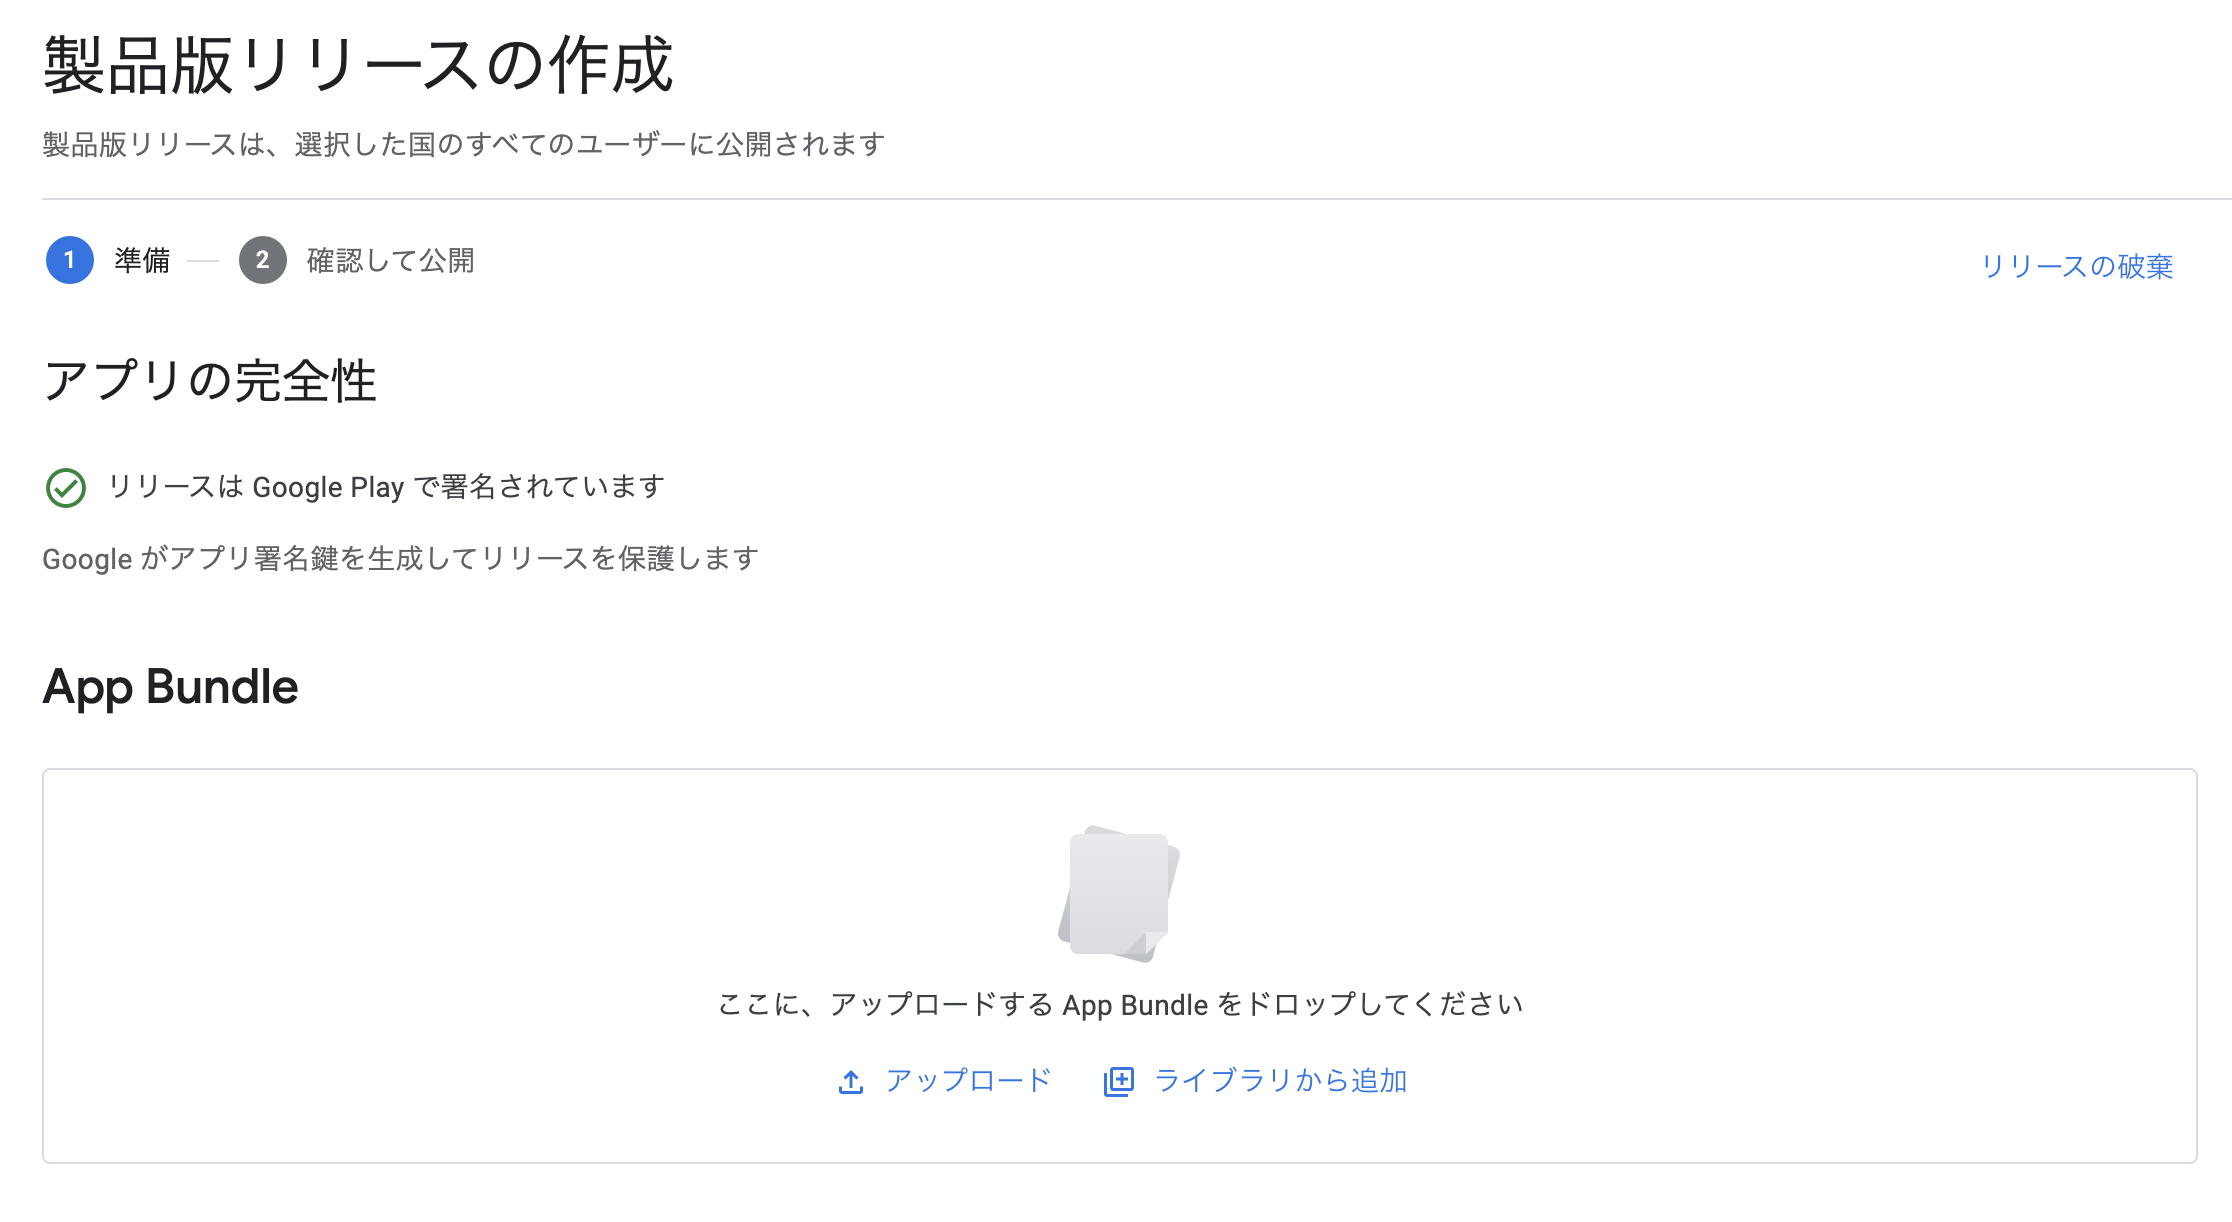
App Bundleのところにapkをドラッグ&ドロップ
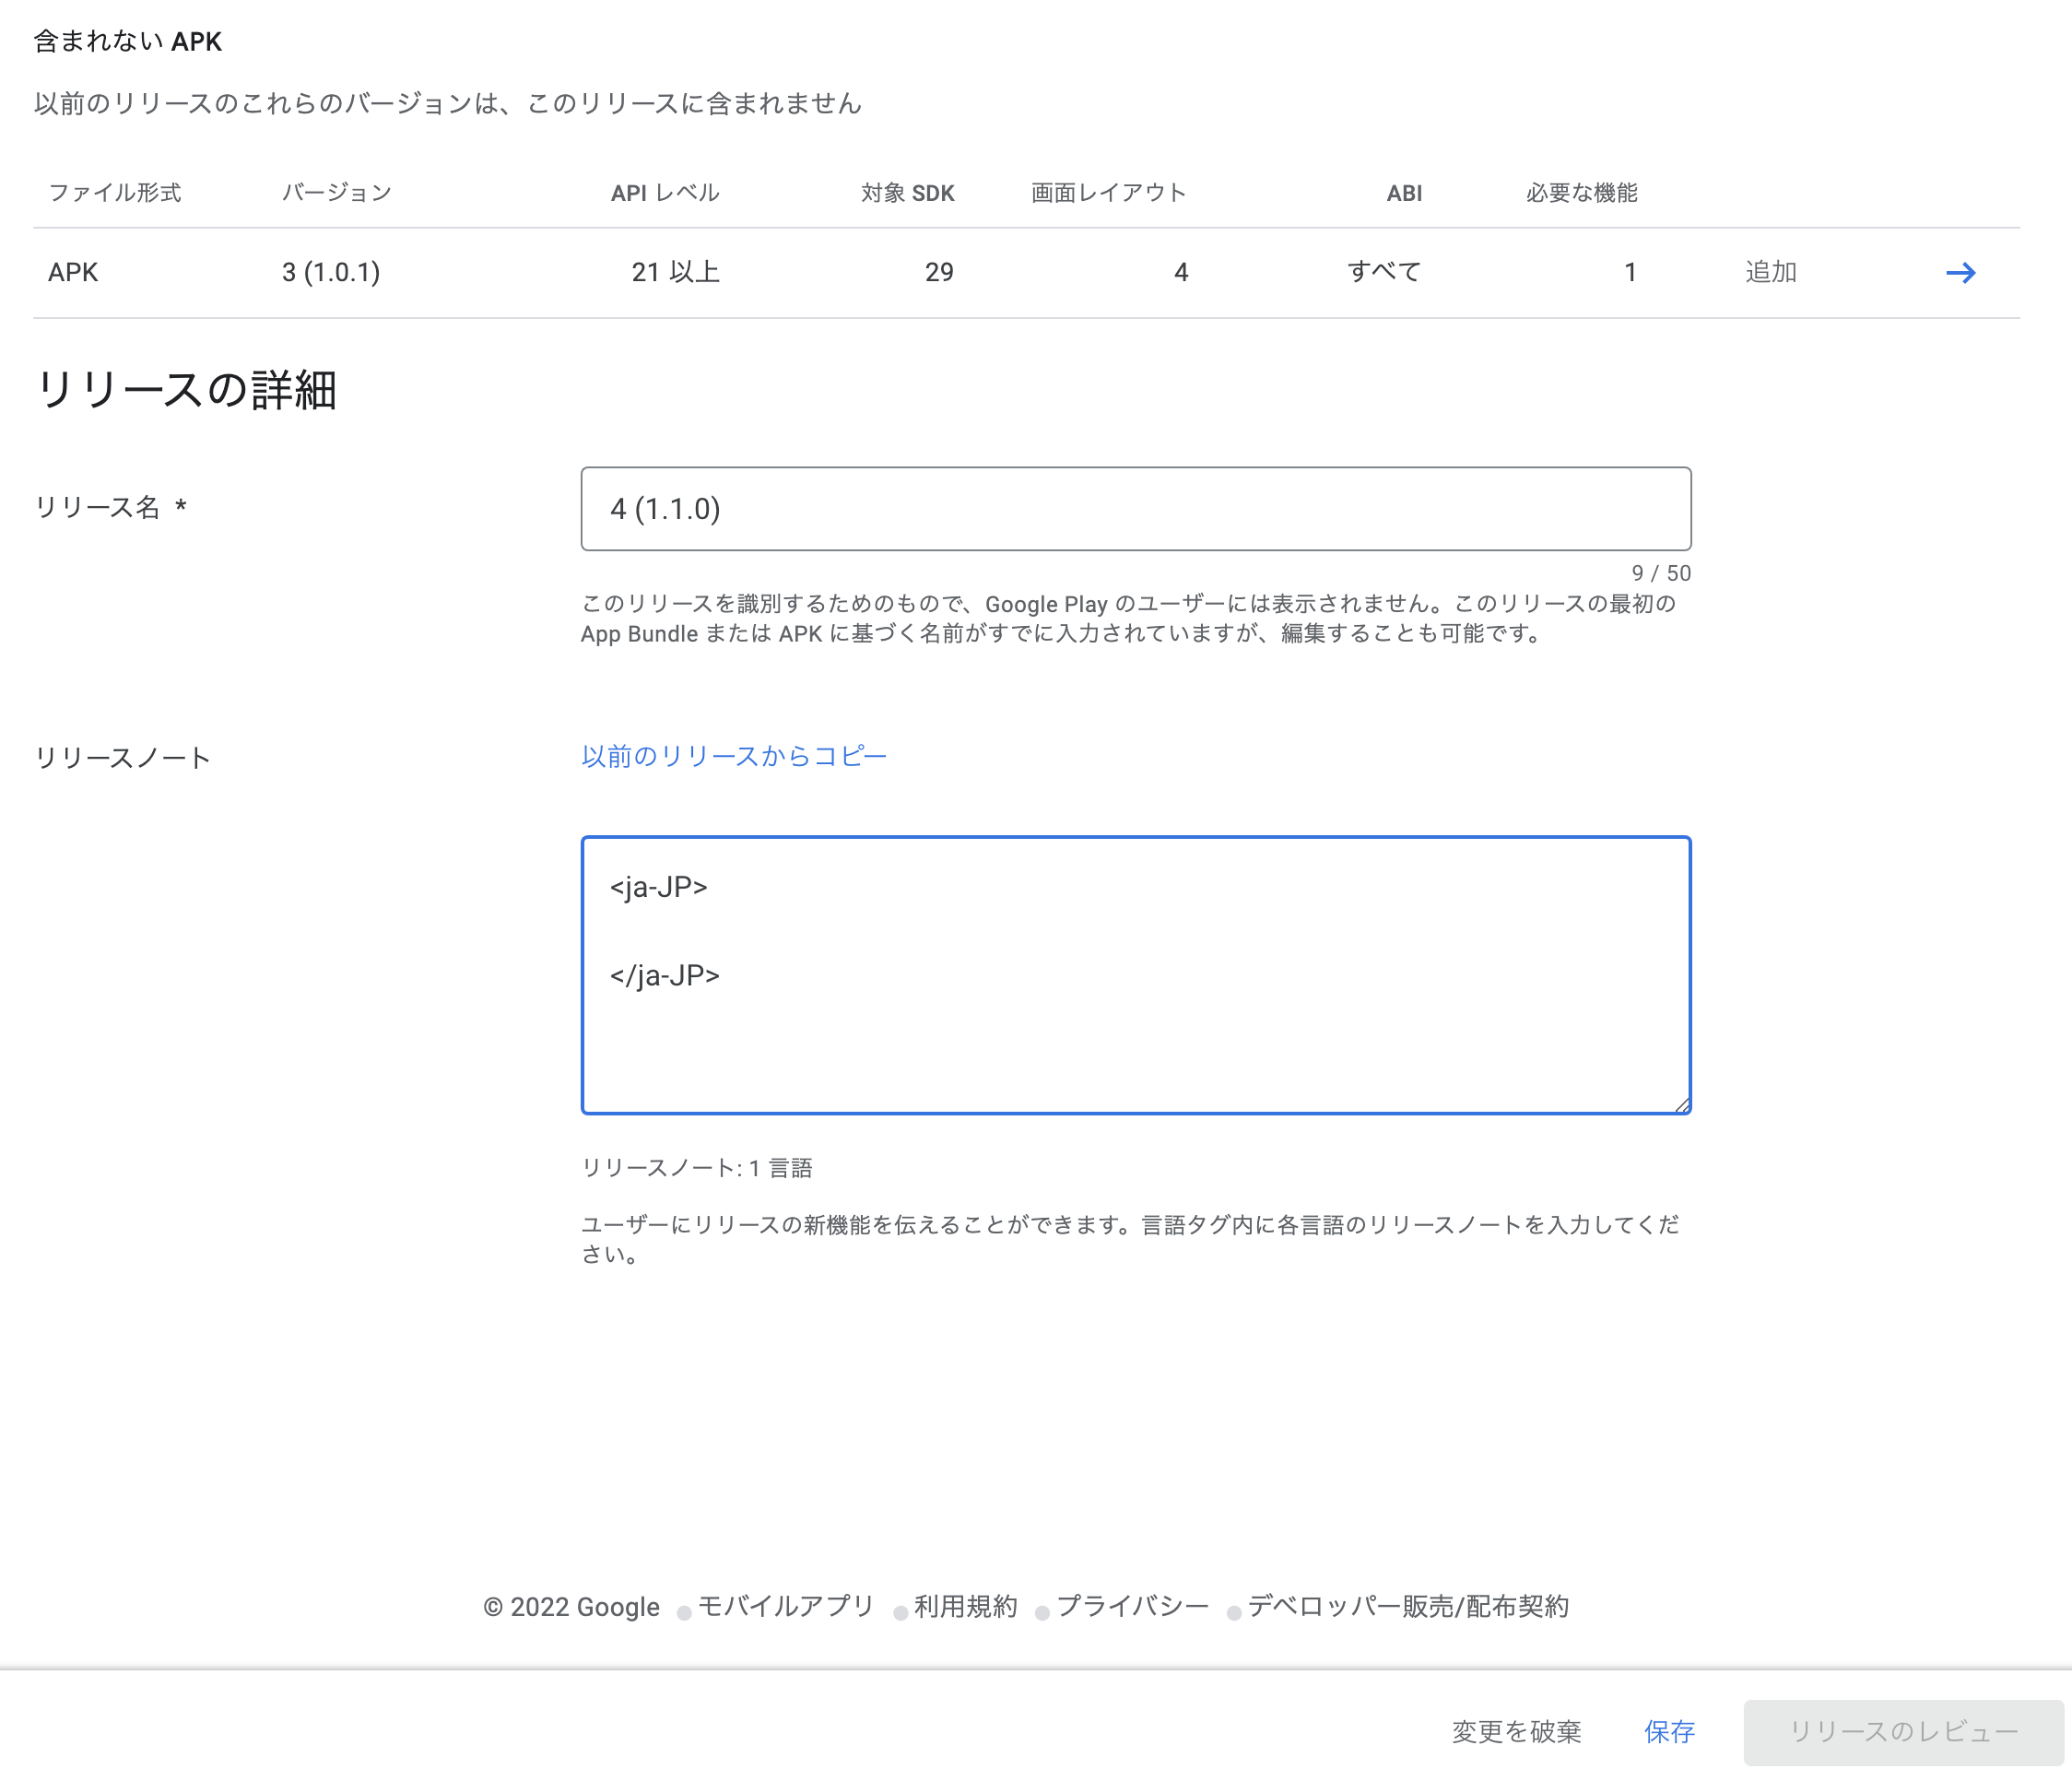
下の方にスクロールしてリリースノートを記入して保存ボタンをタップ
リリースのレビューをタップ

製品版としての公開を開始をタップ

無事申請できて新しいリリースが審査中になりました。

![]()